Tutorial #4
Using Your Own Buttons on Your Web Site
(so customers can get around your Web pages)
Buttons are used on Web pages to allow your Web site visitors to navigate around your Web site. The buttons can be as simple as a color rectangle with text or as complex as moving images. You may place a single button or a group of buttons. Here are the steps to place your own buttons on your Web page.
-
1. Log in to your Web site administration, select your Web site, and click the "Edit" link to the far right of the page whose buttons you want to change.
2. Move your mouse over the current buttons that you want to change, and click your mouse button (the left button, on most systems). In the small option window that pops up, click "Edit".
3. In the new window that appears, click on the button "Customize" to make changes to your buttons.
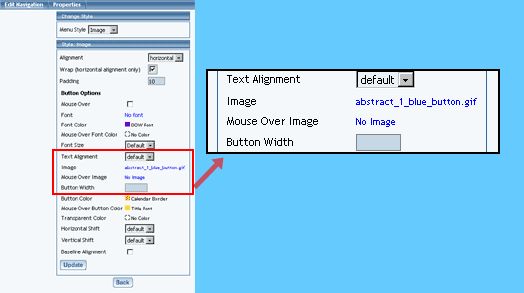
4. The system will show you more information on the buttons. Click on the blue text next to the word "Image".

5. In the new window that appears, click on "Upload Image" to upload the image file of your own button from your computer to the Web site.
6. Click on "Browse". In the new window that appears, search through your computer and click on the filename of the image you want to upload to the Web site. Click on "OK". Click on "Upload".
7. A preview of the image you uploaded will be displayed. Click on the button "Use".
8. Click on the button "Update". Make sure to Publish the Web site so that Web site visitors will be able to see your new image.
Learn More About...
- button basics
- navigation options
- single buttons
- different styles of buttons (image, text, three images)
- Publishing your Web site

|

|