| How to Set Up Entourage for Mac OS X to Send and Receive Email (Wizard) | |
|
|
|
Follow
the steps below to configure Entourage for Mac OS X to send and receive
email.
|
|
How
to Set Up Entourage for Mac OS X to Send and Receive Email
|
-
You will need your email server settings to set up your email program. Print or write down the information that is displayed for use during this walkthrough.
-
Open Entourage.
-
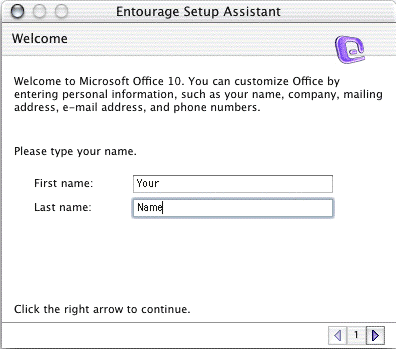
In the First name field, type your first name.
-
In the Last name field, type your last name.
-
Click the right arrow button.
-
Click the right arrow button.
-
Click the right arrow button.
-
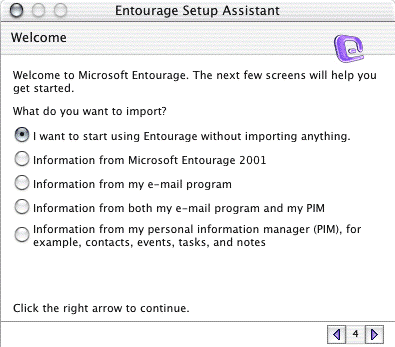
Click the I want to start using Entourage without importing anything radio button in the What do you want to import? area.
-
Click the right arrow button.
-
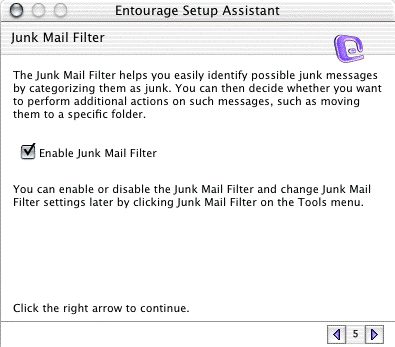
Check the box next to Enable Junk Mail Filter.
-
Click the right arrow button.
-
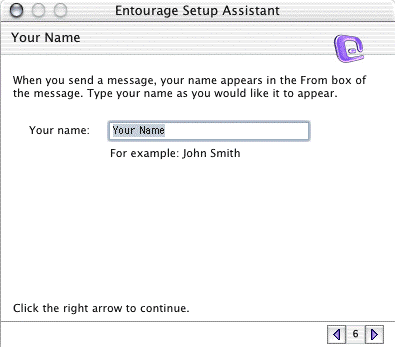
In the Your name field, type your name.
-
Click the right arrow button.
-
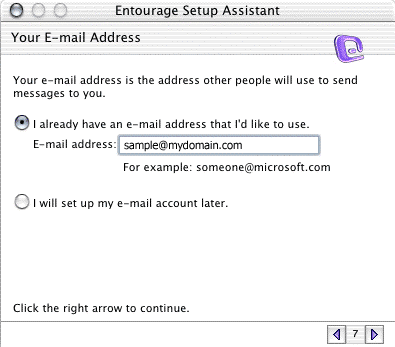
Select I already have an email address I'd like to use.
-
In the E-mail Address field, type your full email address (e.g., sample@yourdomain.com).
-
Click the right arrow button.
-
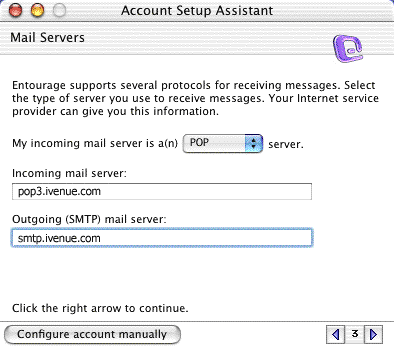
Click the arrow box on the My incoming mail server is a(n) pop-up list and choose POP.
-
In the Incoming mail server field, type your Incoming mail server (POP) as pop3.ivenue.com.
-
In the Outgoing (SMTP) mail server field, type smtp.ivenue.com.
-
Click the right arrow button.
-
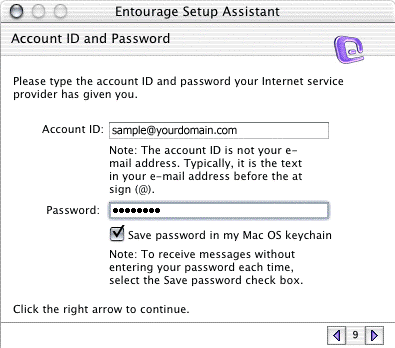
In the Account ID field, type your full email address (e.g., sample@mydomain.com).
-
In the Password field, type your email password.
Note: Your password is case sensitive! Make sure CAPS LOCK is off when typing it.
-
Check the box next to Save password in my Mac OS keychainif you wish to have your password saved.
-
Click the right arrow button.
-
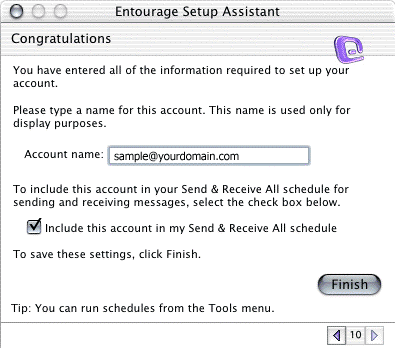
In the Account name field, type your full email address (e.g., sample@mydomain.com).
-
Check the box next to Include this account in my Send & Receive All schedule.
-
Click the Finish button.
-
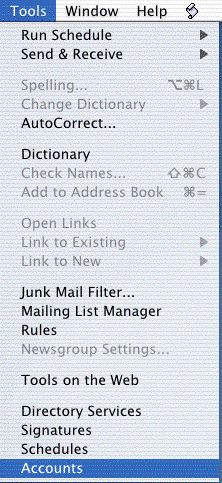
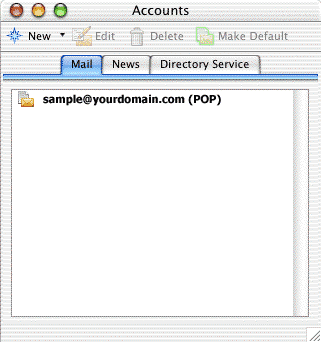
From the Tools menu, choose Accounts.
-
Select your mail account in the list.
-
Click the Click here for advanced sending options button.
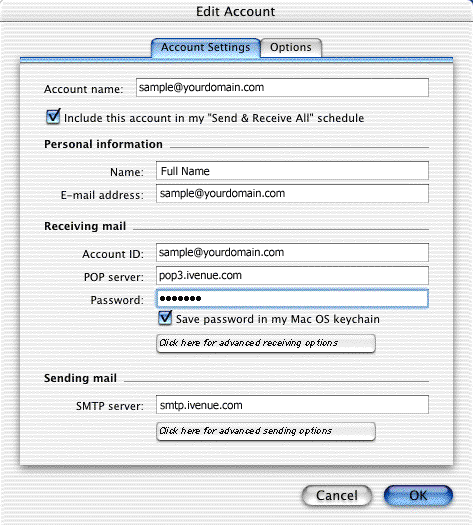
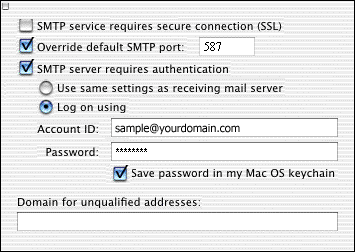
- Check the box next to "Override Default SMTP Port:" and enter 587 in the box. (Check firewall settings if necessary to enable this port)
-
Check the box next to SMTP server requires authentication.
-
Click the radio button in the Log on using area.
-
In the Account ID field, type your full email address (e.g., sample@mydomain.com).
-
In the Password field, type your password.
-
Check the box next to Save password in my Mac OS keychain.
-
Click the OK button.