| How to Set Up Netscape 7 for Macintosh to Send and Receive Email | |
|
|
|
Follow
the steps below to set up Netscape 7 for Macintosh to send and recieve
email.
|
|
How
to Set up Netscape 7 for Macintosh to Send and Receive Email
|
-
You will need your email server settings to set up your email program. Please print or write down the information that is displayed for use during this walkthrough.
-
Open Netscape.

-
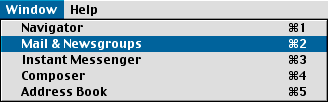
From the Window menu, choose Mail & Newsgroups.
-
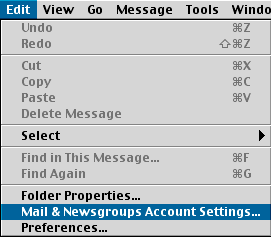
From the Edit menu, choose Mail & Newsgroups Account Settings.
-
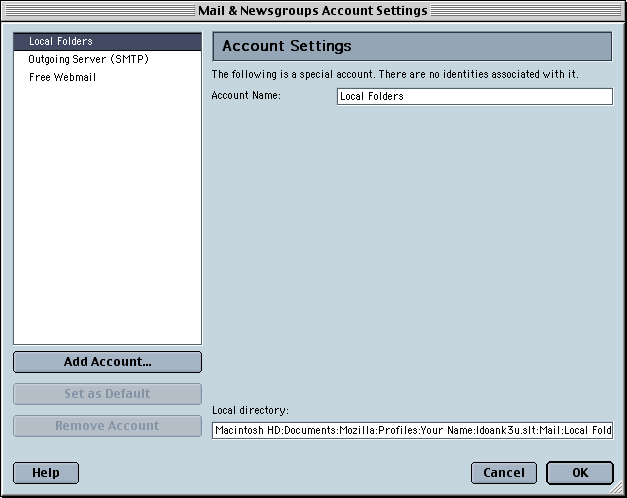
Click the Add Account button.
-
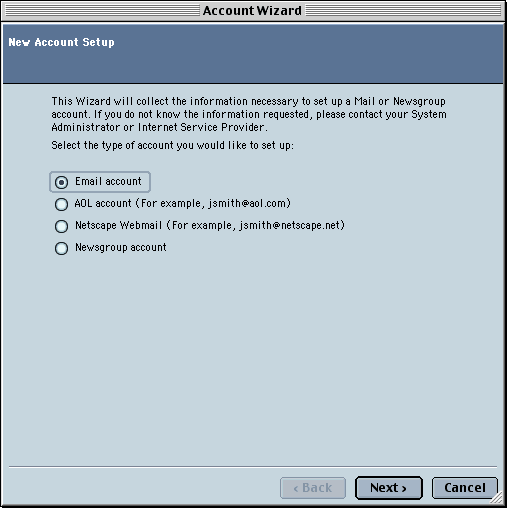
Select Email account.
-
Click the Next button.
-
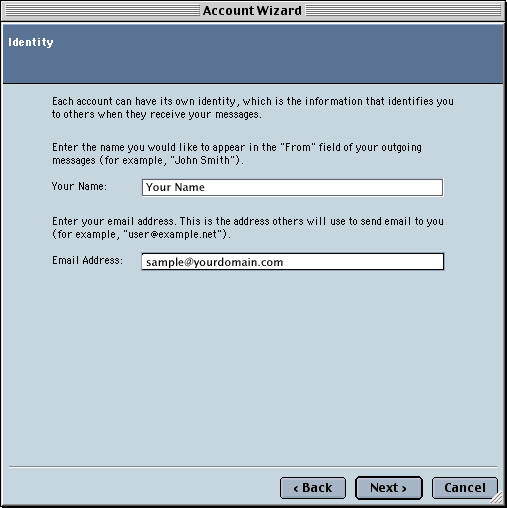
In the Your Name field, type your name.
-
In the Email Address field, type your full email address (e.g., sample@yourdomain.com).
-
Click the Next button.
-
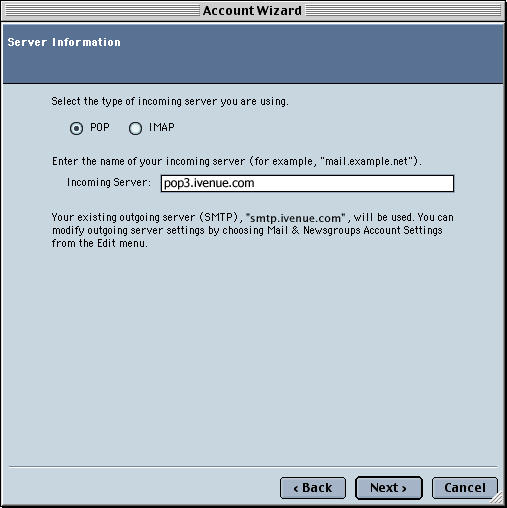
Select POP.
-
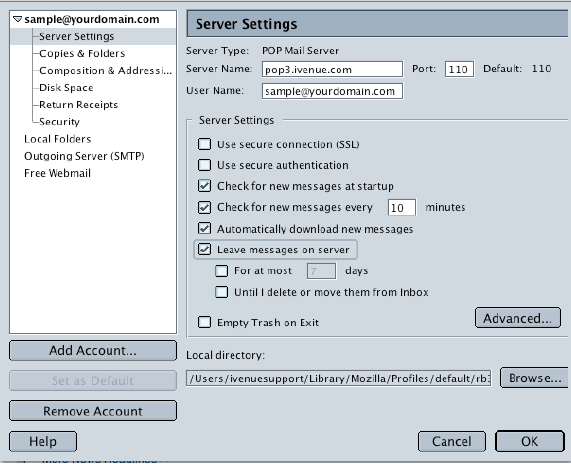
In the Incoming Server field, type your Incoming mail server (POP) as pop3.ivenue.com.
-
Click the Next button.
-
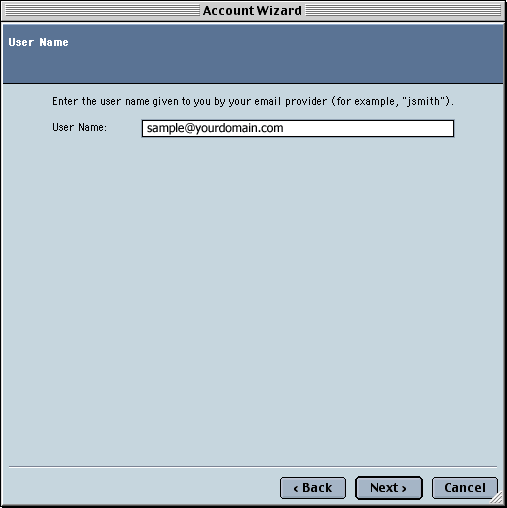
In the User Name field, type your full email address (e.g., sample@yourdomain.com).
-
Click the Next button.
-
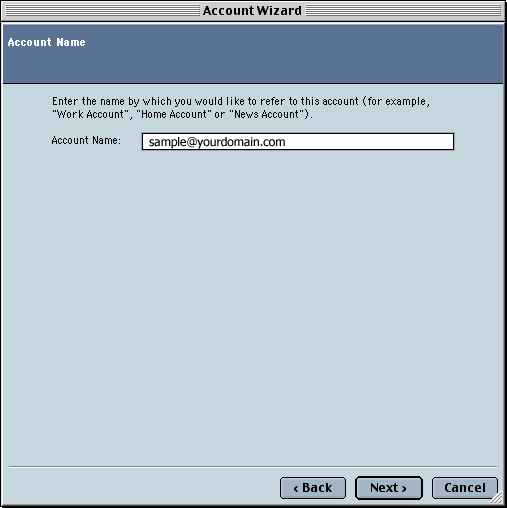
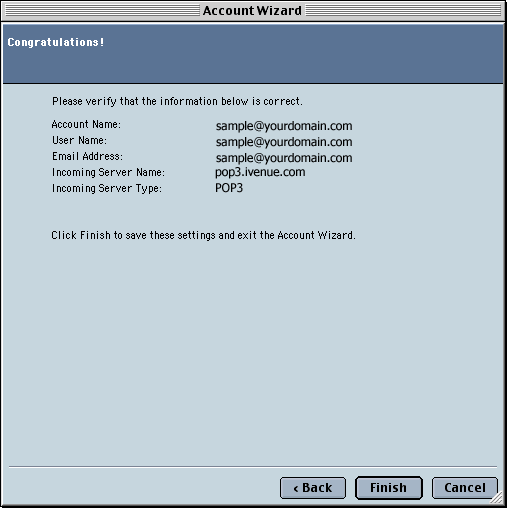
In the Account Name field, type your full email address (e.g., sample@yourdomain.com).
-
Click the Next button.
-
Click the Finish button.
-
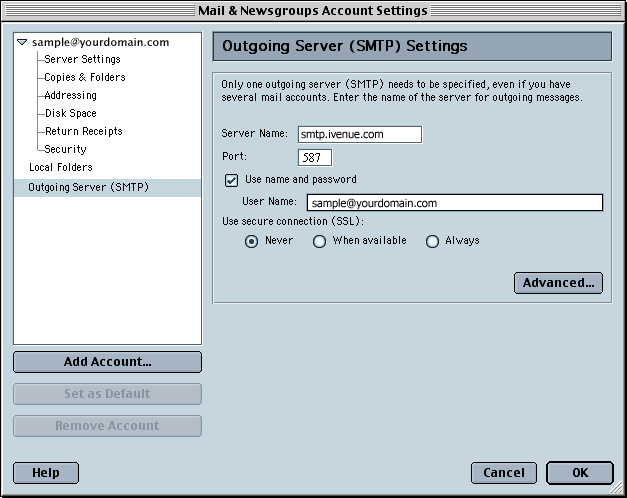
Select Outgoing Server (SMTP) in the list.
-
In the Server Name field, type smtp.ivenue.com.
- Enter "587" in the box next to "Port:". (Check your firewall settings if necessary to enable that port.)
-
Check the box next to Use name and password.
-
In the User Name field, type your full email address (e.g., sample@yourdomain.com).
- Optional: If you would like to use both Netscape and webmail to check your e-mail, click on Server Settings, then check the box for Leave Messages on Server
-
Click the OK button.
Note: When you first send an email, a window asking for your password will appear. Type your email password and click OK to continue.