| How
to Set Up Eudora 7.0 to Send and Receive Email |
- Operating System(s): Windows 98, Windows Me, Windows XP, Windows 2000
- Application: Eudora 7.0
|
|
Follow the
steps below to set up Eudora 7.0 to send and receive email.
|
|
How
to Set Up Eudora 7.0 to Send and Receive Email
|
Configuring your email client: Eudora 7.0
- Open Eudora.
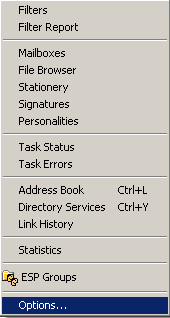
- Click the 'Tools' menu, and select 'Options.'
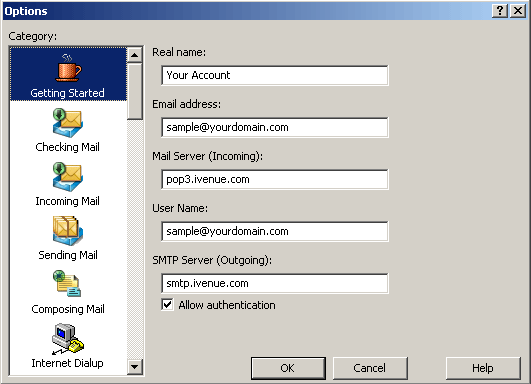
- Click 'Getting Started' under 'Category:.'
- Enter your full name in the 'Real name:' field.
- Enter your full webmail address (sample@yourdomain.com) in the 'Return address:' field.
- Enter 'pop3.ivenue.com' in the 'Mail Server (Incoming):' field.
- Enter your full webmail address (sample@yourdomain.com) in the 'Login Name' field.
- Click 'Allow authentication' below 'SMTP Server.'
- Enter 'smtp.ivenue.com' in the 'SMTP (Outgoing) Server:' field.
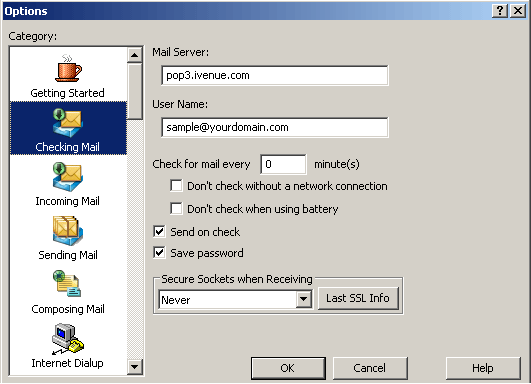
- Click 'Checking Mail' under 'Category:.'
- Set 'Secure Sockets when Receiving' to 'Never.'
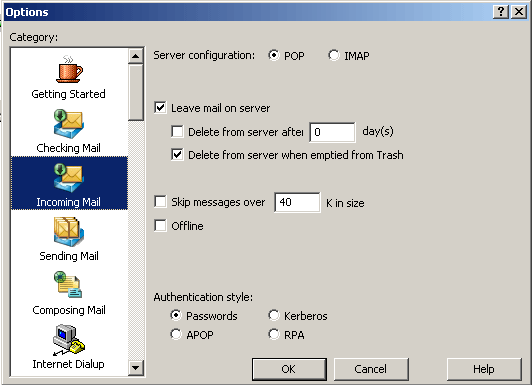
- Click 'Incoming Mail' under 'Category:.'
- Optional: If you want to use both Eudora and webmail to check your mail, check the box for "Leave mail on server".
- Select 'Passwords' for 'Authentication Style.'
- Click 'Sending Mail' under 'Category:.'
- Check the box next to 'Allow authentication.'
- Set 'Secure Sockets when Sending' to 'Never,' and click 'OK.'
- Check the box next to "Use submission port (587)" (Check your firewall settings if necessary to enable that port.).
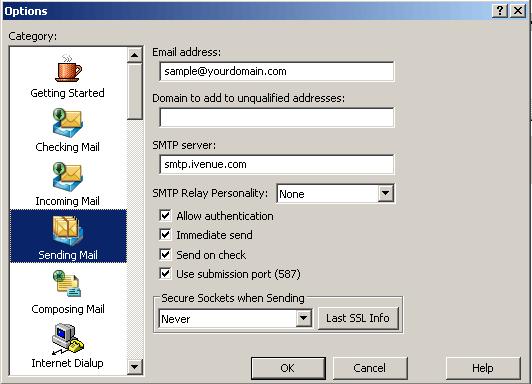
- Click 'OK,' and then verify your settings by clicking 'File,' and then 'Check Mail.'
|


