Configuring your email client: Apple Mail 1.3
- Open Apple Mail.
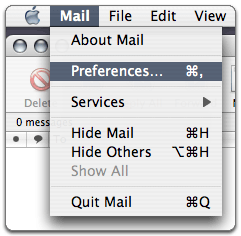
- Click 'Mail,' and select 'Preferences...'
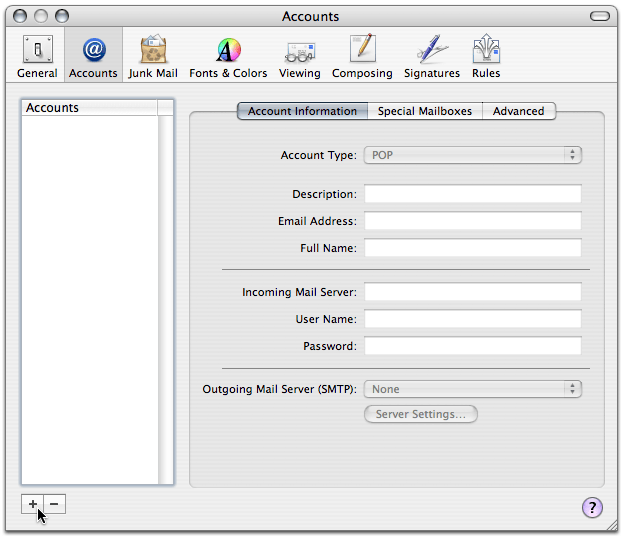
- Open the 'Accounts' tab, and click the plus sign (+) along the bottom to add a new account.
- Enter 'pop3.ivenue.com' in the 'Incoming Mail Server:' field.
- Enter your webmail address in the 'User Name:' field.
- Enter your webmail password in the 'Password:' field.
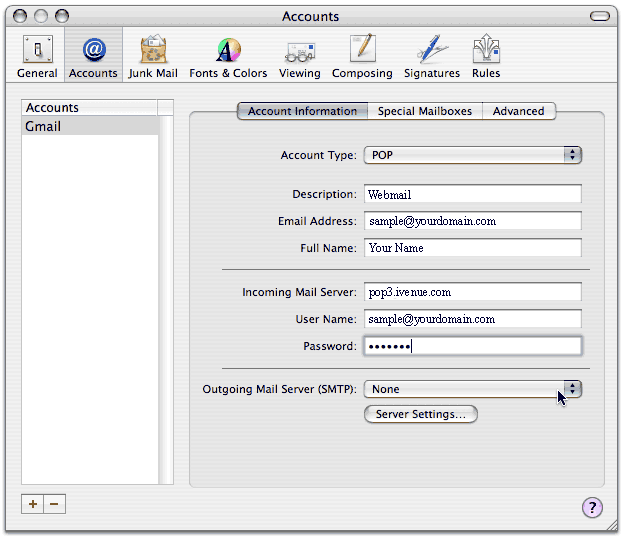
- Select 'Add Server...' from the pop-up labeled 'Outgoing Mail Server,' and enter 'smtp.ivenue.com' in the 'Outgoing Mail Server:' field.
- Enter '587' in the box next to 'Server Port:.' (Check your firewall settings if necessary to enable that port.)"
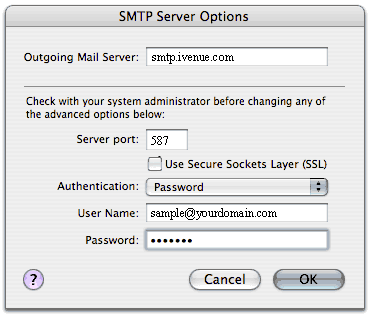
- Select 'Password' next to 'Authentication:' and enter your webmail address and password.
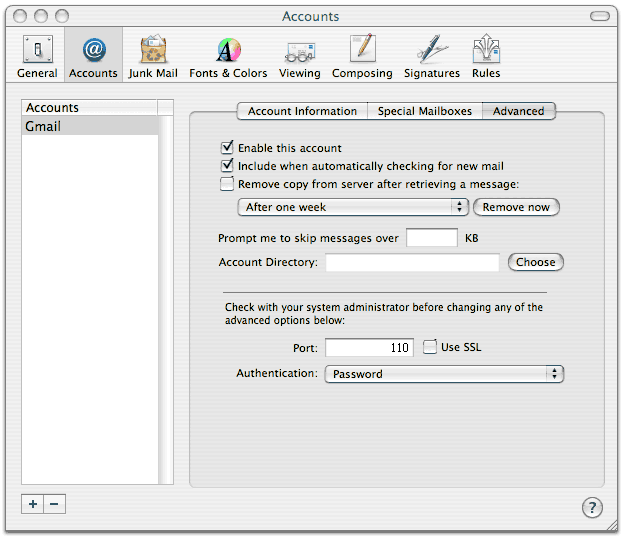
- Optional: If you would like to also use webmail to check your e-mail, click the Advanced tab, then uncheck the box for Remove copy from server after retrieving a message
- Click 'OK.'
|


