Other Component
Flash
Related Links: How to Add a Component | How to Modify a Component | Editing BasicsOverview | Edit Flash | Main Options | Image Options | Text Options | Custom Flash | Flash Introduction Page
Overview
Flash Components allow you to add Flash animation to a Web page. You may use one of our Flash layouts or you may upload and use your own Custom Flash file (SWF or SWT).
You begin by adding a flash component to the page: click on "Page" in the top-left corner of the Page Editor. Click on "Other". Click on "Flash". You will be prompted to name your new flash component. Or if you have existing flash components, you may select one from the list which appears in the add flash window. For more about adding components, click here.
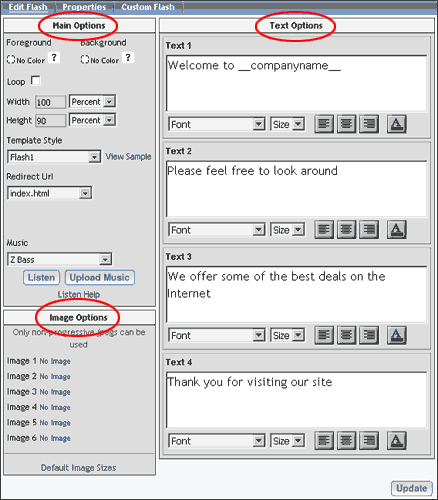
When editing your flash component, you have many options that may be applied. These include main options for controlling how your flash will display and which layout and sounds to use; image options to customize the layout's images; and text options to customize the layout's text.
Back to the Top of the Page
Edit Flash
Main Options:
In the Main Options you can set your main settings of the flash component. In the Main Options you can set the foreground and background color, have the flash loop, set the width and height of the flash, select the flash layout to display, set the page to have the flash redirect to once it is finished playing, and also to select a music file or upload your own.
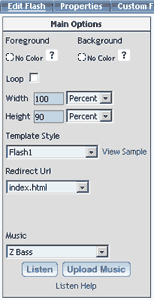
With the flash component, you have the option to set your foreground and background colors, which will vary the looks of the flash depending on the layout that you select and to have the option to have the flash loop, so that it will play continually.
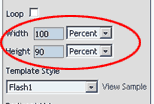
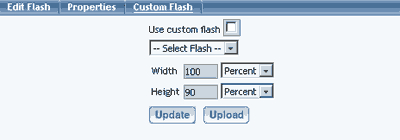
In the "Width" and "Height" fields, specify the dimensions of the Flash component, as it will appear on the Web page. In order for the Flash to display properly on the Web site, you must specify both the height and width dimension for the Flash component. You may specify whether the dimensions of height and width are in pixels or percent by using the drop-down menu next to the width and height fields.
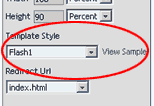
In the drop-down menu next to the text "Layout Style", choose a Flash layout (Flash1 is always the default when a new flash component is added to a page). After you have selected a Flash Layout to work with, you can view a preview of the Flash layout by clicking on the blue text "View Sample". This will show you what the layout looks like but will not add in the changes that you have made.
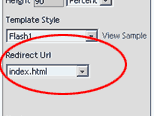
Following that you may specify a url to have the flash page direct to once it is done playing. This option allows you to direct to any page already created within the site.
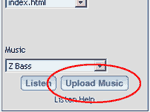
Finally you have the option to select the music you would like to play with your flash component, either from our sample files, or you can upload your own music file by clicking on the "Upload Music" button. After you have selected a music to work with, you can listen to the file by clicking on the "Listen" button. To upload your own music, click on the "Upload Music" button, then click on "Browse" to locate and select your custom music file to use with the Flash component. Navigate through the folders on your computer to get to your music file. Click once on your music file and then click on the "OK" button. Click on the "Upload File" button to upload your music file to your Web site.
Back to the Top of the Page
Image Options:
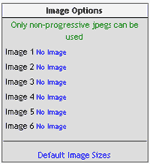
The image options allow you to determine which images will display in the flash component. You have the option to select an image of your own if you would like to do so. Only non-progressive JPEG images can be used with our Flash layouts. Please make sure that you do not choose the "progressive" option when you save your image as a JPEG file. With the image options you are also able to view the default images sizes that are suggested for each image option in each layout. To view the sizing recommendations, click the "Default Image Sizes" link at the bottom of the image options.
Back to the Top of the Page
Text Options:
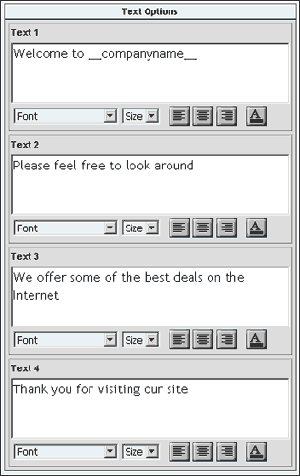
The Text options allow you to edit the text to have it say and appear the way that you would like on the flash layout. With the text options, you can type in your text messages, edit the font size, font face, font color, and alignment of the text. Once you have completed all of your changes, click on the "Update" button to finalize your changes.
Back to the Top of the Page
Custom Flash
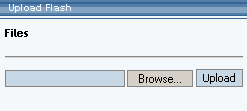
To use your own custom flash, click on the "Upload" then click on the "Browse" button to locate and select your custom Flash file to use with the Flash component. Navigate through the folders on your computer to get to your Flash file. Click once on your Flash file and then click on the "OK" button. Click on the "Upload File" button to upload your Flash file to your Web site.
Flash Introduction Page
One of the default pages that have been built for you is a splash.html page. This splash.html page loads before your index.html page, and is used for a Flash introduction. The splash.html page already comes with a Flash component already placed on the page. You may edit this Flash component to display the Flash layout that you would like to display when a visitor goes to your Web site.
To add a splash page, you would click on the link Add Splash Page in the main menu of the Website Editor.
If you do not want the Flash introduction page to load when visitors come to your Web site, you must disable the splash.html page. If you delete the splash.html page, the system will automatically recreate the page when you publish the Web site.
Editing Basics
Back